



Chipping Turf vs. Putting Green Surface: Which Fits Your Game?
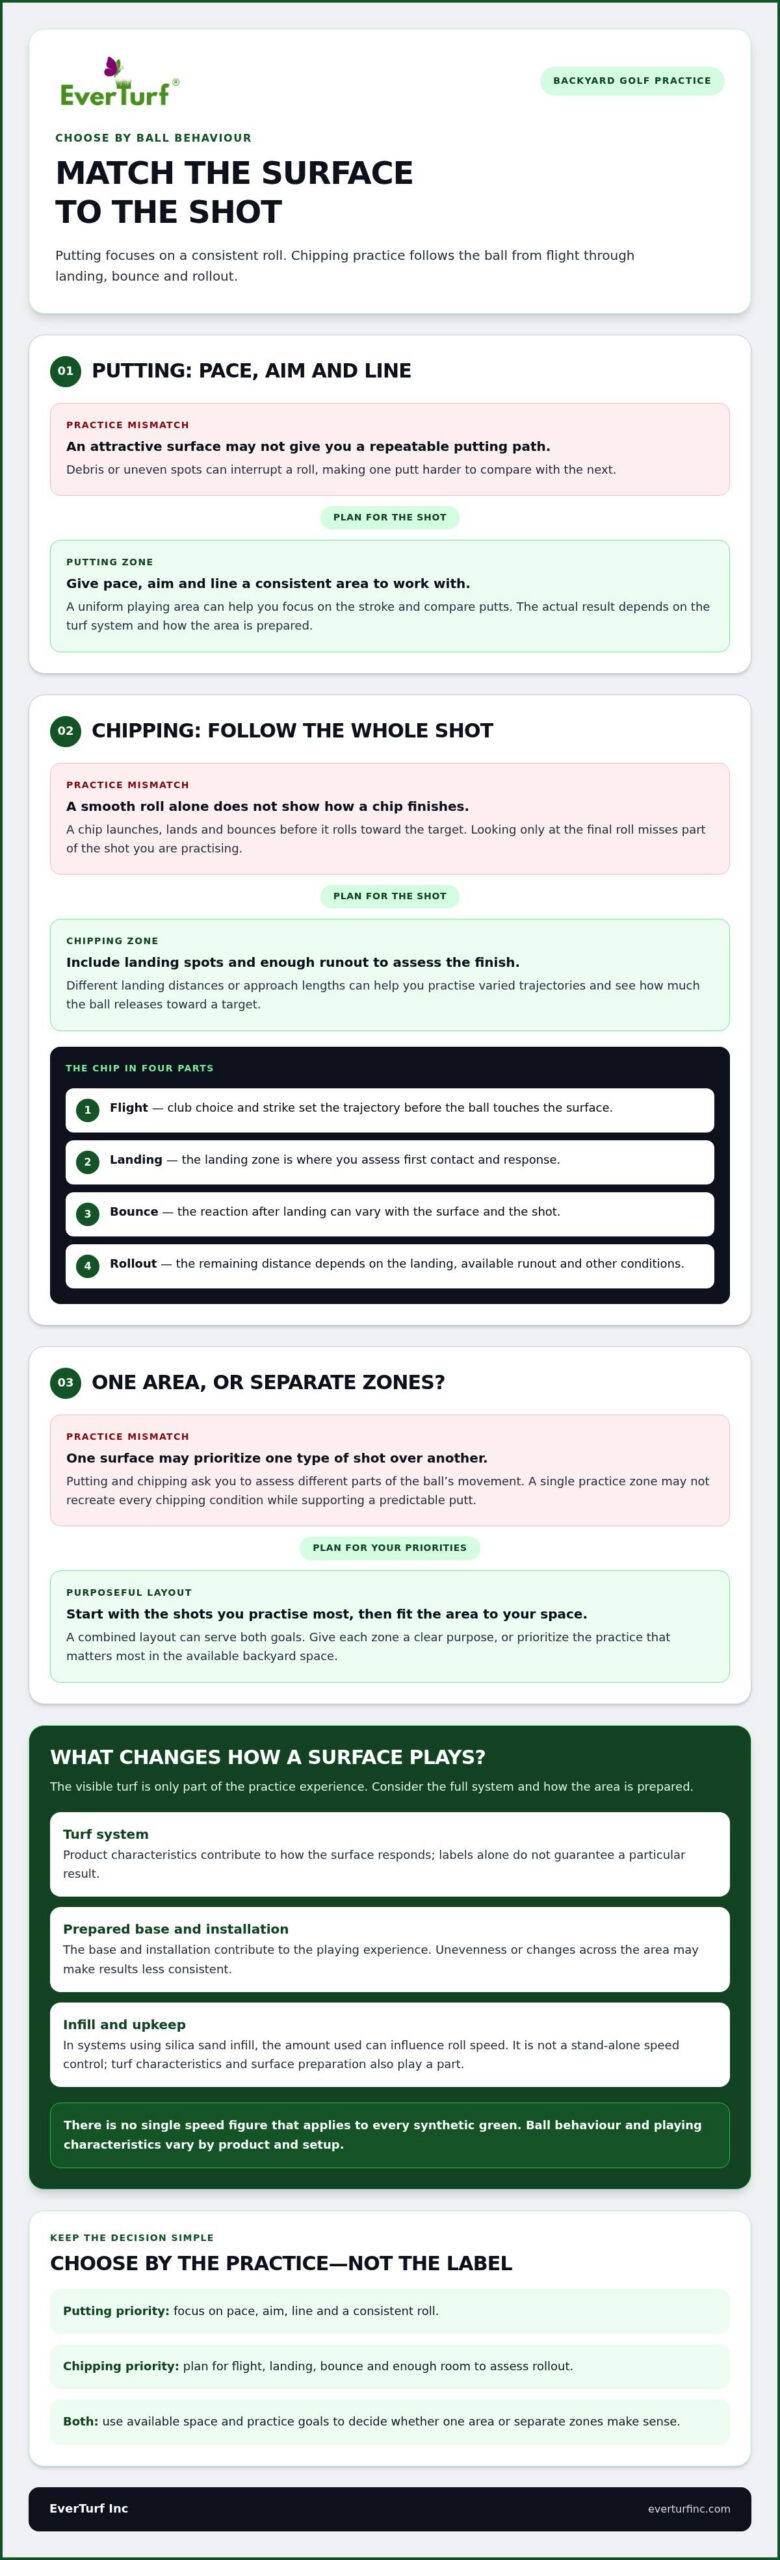
The smoothest-looking backyard turf may not be the best surface for the shots you want to practise. When weighing chipping turf vs putting green surface, focus on how you want the ball to respond: a chip needs room to land and roll, while a putt calls for a consistent path across the green.
It’s easy to assume one turf can handle every shot, especially when both surfaces create a polished practice area. But if the surface doesn’t suit your practice goal, it can be harder to tell whether a result reflects your technique or the setup. Choose by the shots you want to work on, not appearance alone.
This comparison explains how chipping and putting surfaces support different kinds of practice, and what to consider when planning one shared area or separate zones. You’ll also see how available space and your golf goals can guide the layout, with EverTurf putting green options as part of the planning picture. By the end, you’ll have practical criteria for shaping a backyard setup that feels purposeful, whether you’re sharpening your short game, refining your putting, or making room for both.
Key Takeaways
- Look beyond turf labels and compare the shots each surface is designed to support.
- Consider how the chipping turf vs putting green surface choice affects practice, from a chip’s landing and bounce to its final roll.
- Compare options by intended shots, ball behaviour, practice goals, and fit with your backyard layout.
- Start with the shots you practise most, then consider available space and whether one area or separate zones suit your goals.
- Explore EverTurf Putting Green Pro for a backyard area focused on putting practice.
Chipping Turf vs. Putting Green Surface: What Is the Difference?
A putting green surface is planned primarily for putts and a repeatable roll. Chipping turf supports practice with shots that launch, land, bounce, and then roll toward a target. Product names aren’t always used consistently, so a label alone may not tell you how a surface is intended to play. Start with the shots you want to practise and the ball behaviour you want to assess.
A putting green surface is designed to support putts; chipping turf is intended to help practise the flight and post-landing behaviour of chip shots. This is a useful starting point, not a promise that every product with either label will behave the same way. The turf system, installation, and surrounding layout all contribute to the practice experience.
What golfers mean by a putting green surface
A putting area gives golfers a place to work on pace, aim, and line as the ball travels toward the cup. Smoothness and consistency are performance goals: a predictable roll helps you focus on your stroke, though the actual result depends on the turf and how the area is prepared. A putting surface is distinct from a fringe or approach, which can border the green and create a transition into it.
What golfers mean by chipping turf
Chipping practice starts before the ball reaches the ground. You control the shot’s flight, then assess its landing, bounce, and runout. A layout with different landing spots or approach lengths can help you practise varied trajectories and how much the ball releases toward the target. The term “chipping turf” doesn’t guarantee a particular construction or response; performance can vary between systems. For broader context on synthetic grass, Artificial turf covers its uses and history.
Consider two practice goals. If you mainly want to improve short putts and distance control, a dedicated putting area keeps the focus on reading and rolling the ball. If you want to rehearse chips from different distances, plan for a landing area and enough runout to see how the ball finishes. A combined layout can serve both, but each zone should have a clear purpose rather than relying on one surface to imitate every shot.
That’s the practical choice behind chipping turf vs putting green surface: decide whether putting, chipping, or a combination deserves priority in your available space. Then compare options by intended use and the ball responses you want to assess. With the purpose clear, it’s easier to plan an area that feels intentional instead of choosing by appearance or terminology alone.
How Surface Design Changes Putting, Chipping, and Ball Roll
A golf ball’s response reflects more than the visible turf. The turf system, the prepared base beneath it, and the way infill is used can all influence how the surface plays. Installation and upkeep matter, too: unevenness or changes across the practice area may make results less consistent. Surface consistency should support the practice goal, not promise an identical result on every shot.
What influences putting speed and consistency?
For putting, golfers want a surface that lets them focus on pace and line. A uniform playing area can make one putt more comparable with the next, while debris or uneven spots may interrupt a roll. These are goals, not guaranteed specifications; the experience depends on the full turf system and installation.
In systems that use silica sand infill, the amount used can influence roll speed. Infill isn’t a stand-alone speed control: turf characteristics and surface preparation also play a part. There’s no single speed figure that applies to every synthetic green, so don’t assume one product will match another. For a wider view of turfgrass science and playing-surface management, the Golf Course Superintendents Association of America offers industry resources.
What influences chip landing and rollout?
A chip is a sequence, not just a roll. The ball’s flight determines where it comes down; the landing area then shapes its bounce and the space available for rollout. A practice layout with different landing distances and enough runout can help you assess how a shot finishes, rather than focusing only on whether it reaches the target.
Think through each part of the shot:
- Flight: Your club choice and strike set the trajectory before the ball touches the surface.
- Landing: The landing zone is where you assess the first contact and response.
- Bounce: The ball’s reaction after landing can vary with the surface and the shot.
- Rollout: The remaining distance depends on the landing, available runout, and other conditions.
A putting surface intended for a smooth, repeatable roll may not recreate every chipping condition. A chip often asks the ball to land and release across a broader area, while putting practice focuses on movement along the ground. Shot selection, turf system, surface preparation, and the golf ball all influence the result, so exact responses vary by product and setup. A single practice zone can still be useful, but it may prioritize one type of shot over another.
That’s the practical distinction in chipping turf vs putting green surface: assess the full ball path you want to practise, not just how the turf looks. If putting is your priority, include EverTurf putting green options in your planning.
Chipping Turf vs. Putting Green Surface: Side-by-Side Comparison
Use the comparison below to connect each surface with the practice it’s meant to support. These are general distinctions, not guarantees: ball behaviour and playing characteristics vary by turf system, installation, and product specifications.
| Consideration | Putting green surface | Chipping turf or area |
|---|---|---|
| Intended shots | Putts across the green toward a target. | Chip shots that travel through the air, land, and continue toward a target. |
| Practice goal | Work on line, pace, and repeatable putting strokes. | Practise landing a chip and judging how it moves after contact. |
| Ball behaviour to assess | How the ball rolls across the playing area. | How the ball lands, bounces, and rolls through the available runout. |
| Layout considerations | Prioritize a clear putting area with useful lines to the target. | Allow room for a landing zone and space beyond it for the ball to release. |
| Potential overlap | A putting area can be part of a larger practice layout. | A chipping zone can lead toward a putting target, though its playing characteristics may differ from the putting area. |
Which surface better matches your practice goals?
If most of your practice involves putts, choose a surface intended to support putting and prioritize pace and line. If you want to work on short-game shots, plan for both a chip landing area and enough runout to observe what happens next. One goal centres on the ball rolling from the start; the other includes the transition from flight to ground play.
For example, a golfer focused on distance control might prioritize several clear putting lines. Someone practising chips from different spots may value a layout that gives shots room to land and finish. The right balance depends on which shots you expect to practise most often.
Can one practice area serve both purposes?
Yes, a backyard layout can include both objectives. Separate zones can make a practice routine easier to organize: use the area designed for putts, then move to a distinct landing and runout zone for chips. This makes each goal clear, although the footprint and design need to accommodate both.
A single blended surface can make efficient use of space, but it involves trade-offs. A setup chosen to emphasize putting may not recreate every chip-shot landing condition, and a chipping area may not offer the putting experience you want. Neither arrangement guarantees a match for every natural-course situation.
The central choice in chipping turf vs putting green surface is what you want to prioritize: consistent putts or useful practice for chip landings and rollout. If both matter, plan the areas around those distinct goals instead of expecting one surface to do everything equally well.
How to Choose a Chipping or Putting Surface for Your Backyard
A useful backyard practice area starts with the way you actually play. Before choosing turf, picture a normal practice session: which shots do you reach for first, and what would you like to improve? Use the steps below to turn those answers into a layout plan.
Start with your shots, space, and practice routine
- Set your priority. Decide whether putting, chipping, or a deliberate mix deserves the most space. If you mainly work on pace and line, put the putting area first. If you often practise short chips, plan for shots to land and continue toward a target.
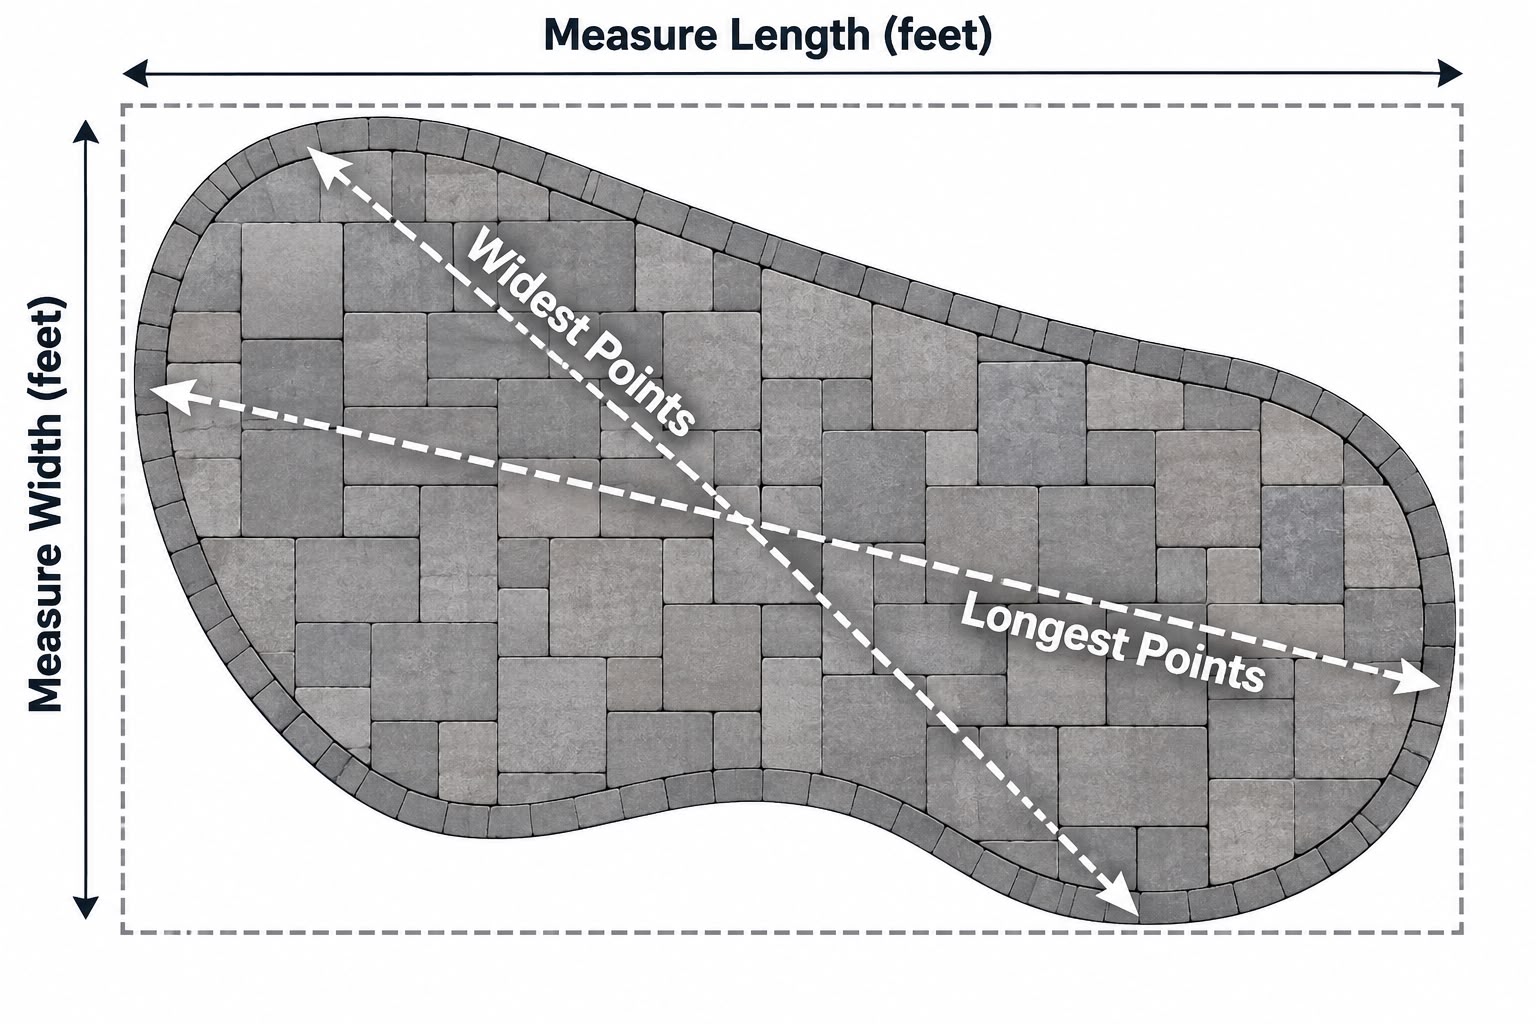
- Map the available area. Note the space’s shape and any boundaries that affect shot direction or ball travel. A narrow layout may suit focused putting practice, while a broader footprint can make room for a chip landing zone and runout.
- Place the target and landing area. Consider where the cup or target will sit, where chip shots can land, and how much room remains for the ball to move afterward. Account for the full shot path so each practice zone has a clear purpose.
- Write a simple practice plan. List the shots you expect to practise most often. If your routine centres on putts with occasional chips, make putting the anchor and treat chipping as a secondary zone. This keeps the design connected to your habits rather than appearance alone.
For broader project-planning context, the EverTurf putting green guide can help you think through how a putting area fits into your backyard. Use it to consider the relationship between the target, approach, and surrounding space.
Compare system details before choosing turf
Once the practice goal and layout are clear, compare documented surface specifications with the shots you want to play. Look at the complete turf system and its intended use, not just the product label. For a putting-focused area, consider the stated characteristics relevant to putts. For chipping, account for the landing zone and available rollout. Don’t assume that two surfaces will behave alike just because they look similar.
Infill is one element of the finished system, not a substitute for evaluating the whole setup. Its role and use depend on the turf and intended practice area. The guide to turf infill offers a focused explanation to support that comparison.
In the chipping turf vs putting green surface decision, clarity about your routine helps keep design choices practical. Explore EverTurf putting green options as you shape a backyard area around the golf shots you want to practise.
Explore EverTurf Putting Green Options for Your Practice Area
Once you’ve identified the shots you want to practise and mapped out the space, narrow your turf choice around a clear purpose. If putting is the priority, EverTurf offers putting green solutions, including EverTurf Putting Green Pro. Consider the product alongside your planned target, layout, and putting practice goals. A putting green product should not be assumed to recreate every chipping condition.
When a putting-focused EverTurf solution makes sense
A putting-focused option may suit a golfer who wants a dedicated backyard place to work on putts. Before choosing, bring together three considerations: the shots you expect to practise most, the area available for the layout, and the documented characteristics of the surface system. This keeps the decision grounded in how you’ll use the space, rather than in a product name or appearance alone.
If chipping is also part of your routine, decide how it fits into the plan. You might prioritize putting and reserve a separate area for chip landing and runout, or give both goals space in a mixed-use design. Keep the expectations distinct: EverTurf Putting Green Pro is a putting green product, so assess it as part of a putting-focused plan.
Turn your comparison into a clear next step
Before exploring options, summarize your intended practice in one sentence. For example: “I want a dedicated putting area,” or “I want to practise both putts and chips, with room for each.” Then compare the planned layout with available space and the surface information for the turf system. This short brief helps keep your choices focused on how the practice area will fit into your backyard.
The EverTurf Putting Green guide provides broader context for planning a backyard putting green. Use it alongside your shot priorities and layout notes to explore the project with a clearer sense of purpose. The distinction in chipping turf vs putting green surface comes down to the practice experience you want, not a one-size-fits-all answer.
Browse EverTurf putting green options and compare them with your intended shots, available layout, and practice goals.
Shape a Backyard Practice Space You’ll Use
Picture the routine you want your backyard to make possible. Will you step outside for a few focused putts, or do you want a space that supports a broader short-game session? Let that vision guide the design so the practice area feels natural to use and earns its place in your outdoor space.
The chipping turf vs putting green surface decision becomes more meaningful when it reflects how you want to spend your practice time. EverTurf offers specialized synthetic turf and installation accessories, including EverTurf Putting Green Pro for putting-focused plans. Build your idea around the play you value, then choose a setup that supports those goals.
Explore EverTurf putting green options to plan a backyard practice area around the shots you want to work on.
Frequently Asked Questions
Is chipping turf the same as putting green turf?
No. The terms usually point to different practice purposes, but naming can vary across products. Putting green turf is intended for putting practice, while chipping turf is associated with shots that land and continue moving. When comparing options, look at the documented intended use and surface specifications rather than relying on the label alone. That makes the chipping turf vs putting green surface choice clearer for your game.
Can you chip on an artificial putting green?
Yes, you can hit chip shots onto an artificial putting green, but that doesn’t mean every putting surface is designed to reproduce the landing and rollout you want to practise. For occasional short chips, use a controlled landing spot and observe how your ball responds. If chipping is a regular focus, plan for a practice area suited to that purpose instead of assuming a putting surface will cover every short-game need.
Does pile height determine how a golf ball rolls on turf?
No. Pile height is one factor, not a complete predictor of ball roll. The turf system, including its surface characteristics, infill where used, and installation, can affect how a golf ball moves. A ball’s speed and path also depend on how it’s struck. When comparing products, consider the documented specifications as a whole and avoid judging expected performance from pile height alone.
Can one backyard turf area work for putting and chipping?
Yes, one backyard area can support both, especially if you plan how each shot will use the space. For example, you could focus most of the area on putting and reserve a section for chip landings. The compromise is that a single surface may not deliver the same practice experience for both shots. Set your main goal first, then decide how much room the secondary activity deserves.
Does infill affect an artificial putting or chipping surface?
Yes, infill can influence how an artificial turf system plays, though its role depends on the product and installation. For putting surfaces, silica sand infill can affect roll speed, but it isn’t the only factor. Don’t assume that adding or changing infill will create a particular result across all turf systems. Consider the infill information alongside the turf specifications and practice purpose.
How can I make an artificial golf surface feel more realistic?
Build the practice setup around the shots you want to rehearse, rather than expecting turf alone to recreate a natural course. Give yourself a clear target, useful putting lines, or a defined chip landing area, depending on your goals. Practise from different positions and notice how your ball responds. Keep the surface in consistent condition so changes in your results are easier to assess.